WaiverCat + Paintball digital waiver solution with Javascript
You’re building a custom web application for an experience business— be it a paintball facility, an escape room, an axe throwing shop, you name it.
You create registration and login pages for the end users, plus a host of features related to the service. The axe-throwing joints want a blog so they can write about the different types of axes, good throwing form fundamentals, and background on their business. The paintballers need an e-commerce plugin that takes their merchandise store online. The escape artists request a custom scheduling tool that ensures their rooms are maximally booked.
Great! None of these are a walk in the park, but at least there are solid resources online and fairly applicable standards.
So why does the built-in digital waiver feature yield such undesirable options as:
- Change the entire business pipeline to work within a clunky digital waiver “solution”.
- Attempt to build an integration with a formal eSignature provider– like DocuSign or HelloSign– and be out thousands of dollars each month on API signature requests.
- Add a catch-all “I consent” check-box to the registration page and hope that it counts.
- Implement a disjoint and manual pen-and-paper solution.
Why can’t the digital waiver requirement be checked off as easily as the other IT requirements?
Our guess is that this is the result of a sales-over-IT mentality in the fragmented digital-waiver market.
WaiverCat
WaiverCat is a simple tool for sending signature requests via an intuitive API. It includes endpoints for sending envelopes and signature webhook-notifications, providing maximal flexibility. It also supports white-labeling so users can embed the document annotation process in their own sites and apps. Users currently leverage WaiverCat for both group and individual waivers.
In other words, WaiverCat works behind the scenes so that signers aren’t corralled into some poor-UX, off-website signing process. I think this point is best made with an example.
Extreme Paintball example: without waivers
This example integration is built entirely with JavaScript. The backend is a simple Node / Express API and the frontend is a Create React App. You’ll need to run each to see the app at work; there are instructions in the README.
Repository: https://github.com/koptional-org/paintball-example.git
(non-vendor) lines of code: 609
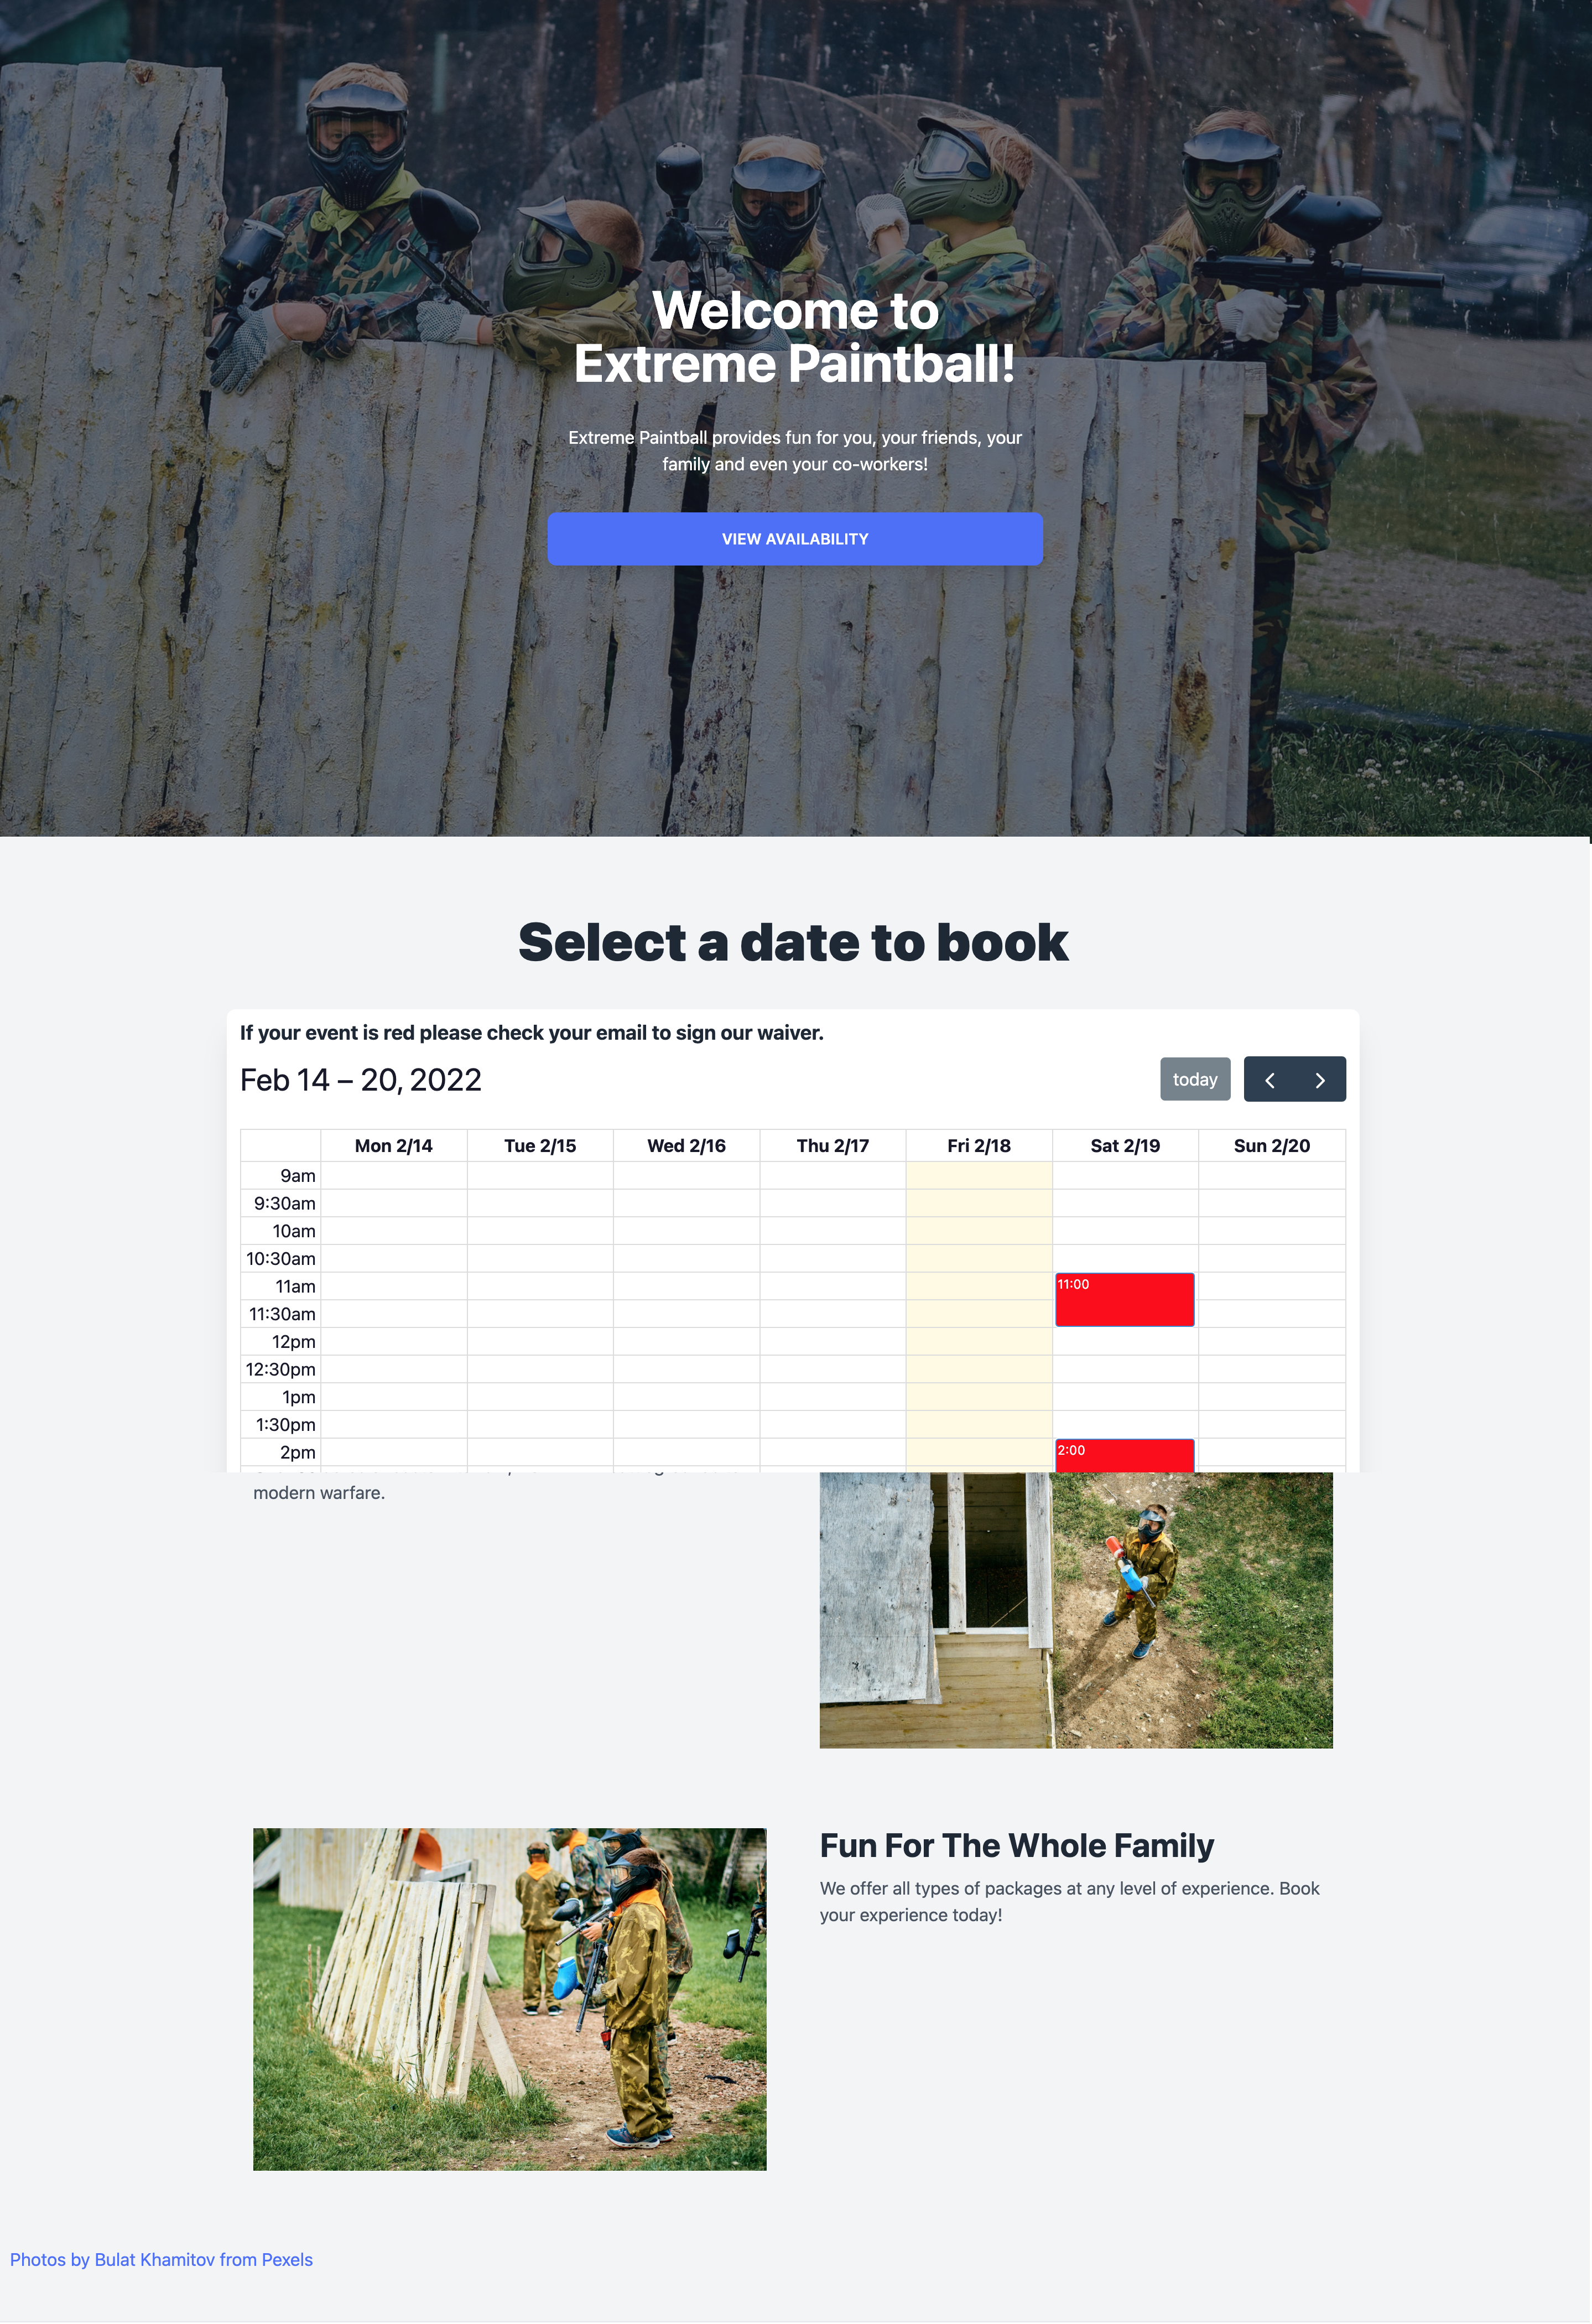
We’ve built an “Extreme Paintball” landing page packed with stock photos and a scheduling tool where visitors can “book” paintball sessions.
We’d require users to signup and login prior to scheduling if we were launching this site.
Run the project (instructions in the root README) and play around with the scheduler. Cool, except Extreme Paintball definitely wants its users to sign waivers prior to booking…
Adding a WaiverCat integration
Estimated time: 2 minutes
Let’s see how fast and simple WaiverCat is.
Sign-up for a free WaiverCat account at https://app.waivercat.com/login
In the top-left corner of the WaiverCat page click “Add Form” and upload a digital waiver PDF. Here’s one you can use:
Next you’ll be taken to an annotation page. Here, you indicate which parts of the form users will actually sign. Add signature points accordingly: use a Normal Signature for “Signature of Participant”, a Date ****for “Date Signed”, and a Custom Field for everything else. Custom Fields allow the signer to fill in requested text. When you’re done marking up the form, click “Finish”. Go back to the Forms page and copy the ID of the liability waiver you just created— you’ll need it in the next step.
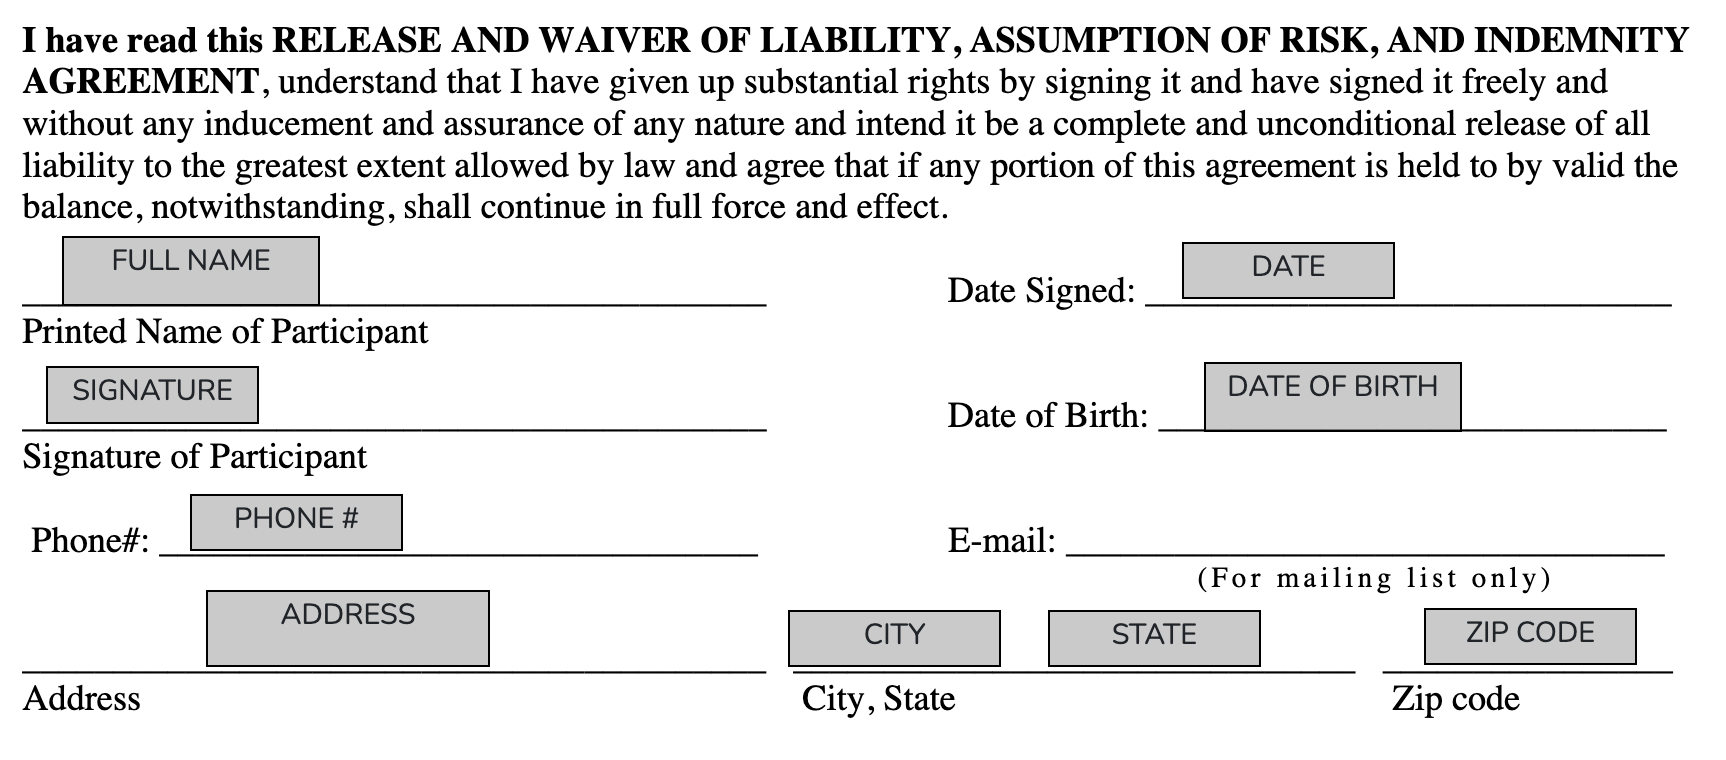
Here’s what the annotated portion looks like.
From the WaiverCat dashboard, grab your API key from the developer page. Then, in the
backenddirectory of the paintball app, create a.envfile and add these two lines, swapping in your API key and liability waiver ID:- WAIVERCAT_API_KEY=“<YOUR_API_KEY>”
- LIABILITY_WAIVER_ID=“<YOUR_LIABILITY_WAIVER_ID>”
Finally, checkout (
git checkout) thewaiversteviebranch. Deletebackend/paintball.db, then restart your backend and frontend.
Now when you schedule an event, the email you use will receive an invite to sign the waiver. The schedule slot will stay red until you sign the document. However, if you sign the document and then press the “CHECK FOR SIGNED WAIVERS” button, the event will turn green!
Ditching the ‘CHECK’ button
Manual status update requests are not ideal. Lucky for us, they aren’t necessary! WaiverCat supports webhooks which notify us when signing events occur. So instead of polling, you can create a webhook on your liability waiver.
In order to allow WaiverCat to talk to your server running on localhost, you’ll have to use a service like ngrok to proxy a local port on a public URL. Just make sure to update the ENDPOINT variable in frontend/src/hooks/schedule.js.
Conclusion
I encourage you to see the code changes yourself; in a few lines of code we’ve integrated a digital waiver solution without:
- sitting through a demo with a sales representative
- drastically changing our application
- compromising on the signature process.
There’s a ton more we could do with the WaiverCat API, but that’s kind of the point. You can get up and running quickly and ease into a robust API.